
Alert Box
Notification Box
HOW-TO: Register for Classes
All current undergraduate and graduate students register for classes via the Penguin Portal.
Review the instructions below to process your registration for each semester.
You may contact the Penguin Service Center at (330) 941-6000 or onestop@ysu.edu for registration assistance;
the office is located on the second floor of Meshel Hall.
Go to REGISTRATION INSTRUCTIONS WITHOUT SCREENSHOTS
GO TO ONLINE VIDEO INSTRUCTIONS
Instructions with Screenshots
1. Log into the Penguin Portal. Click on "Student Dashboard."

2. Under the Registration heading, click "Register for Classes."

3. Select the "Register for Classes" tile.

Caution: If you open multiple browser tabs while on the registration page, there can be an issue which causes information to display incorrectly or to appear “blank” when viewing page results. For best results, we suggest using only one tab while attempting to register for classes.
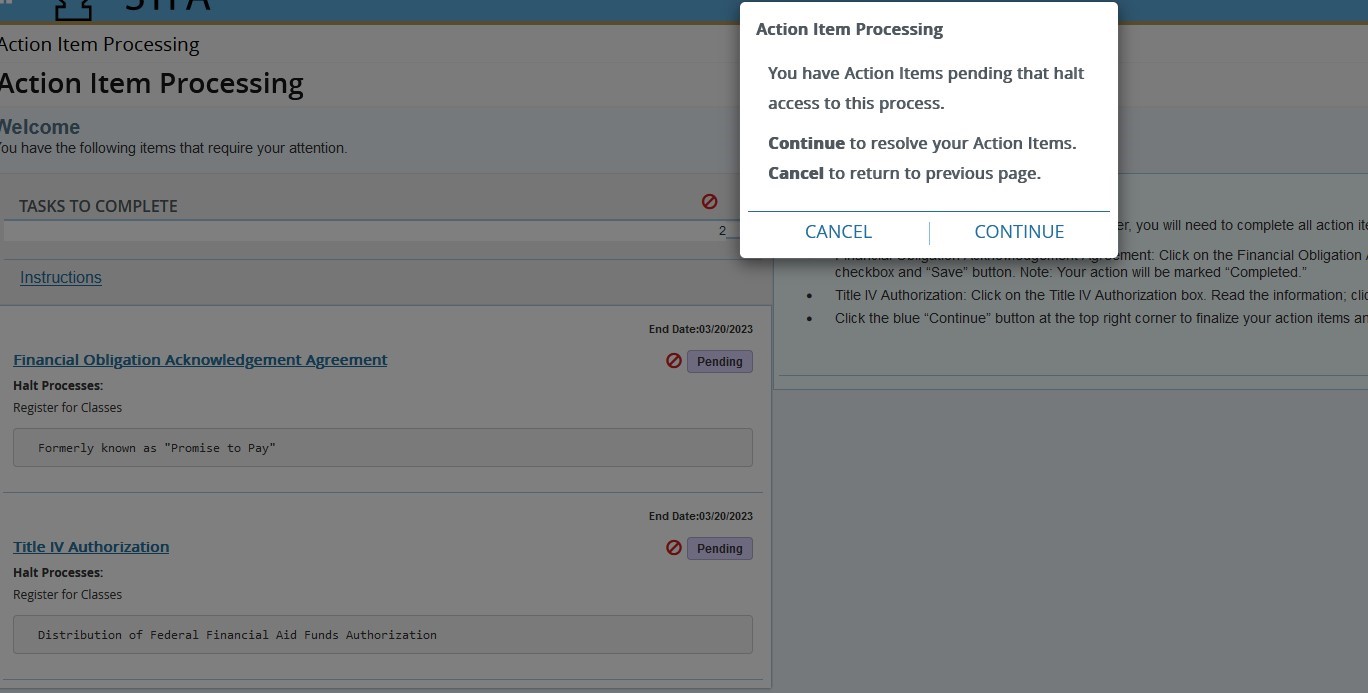
4. If this is your first time trying to register for the year, you will receive an "Action Item Processing" pop up box. Click "Continue" to complete your required actions. You may also see an "Enhance your Experience" pop up box; click "Accept" or "No Thanks" - the choice is yours!
5. Financial Obligation Acknowledgement Agreement: Click on the "Financial Obligation Acknowledgement Agreement" box. Read the information that populates, click the "I ACCEPT" checkbox and "Save" button.
Note: Your action will be marked "Completed."
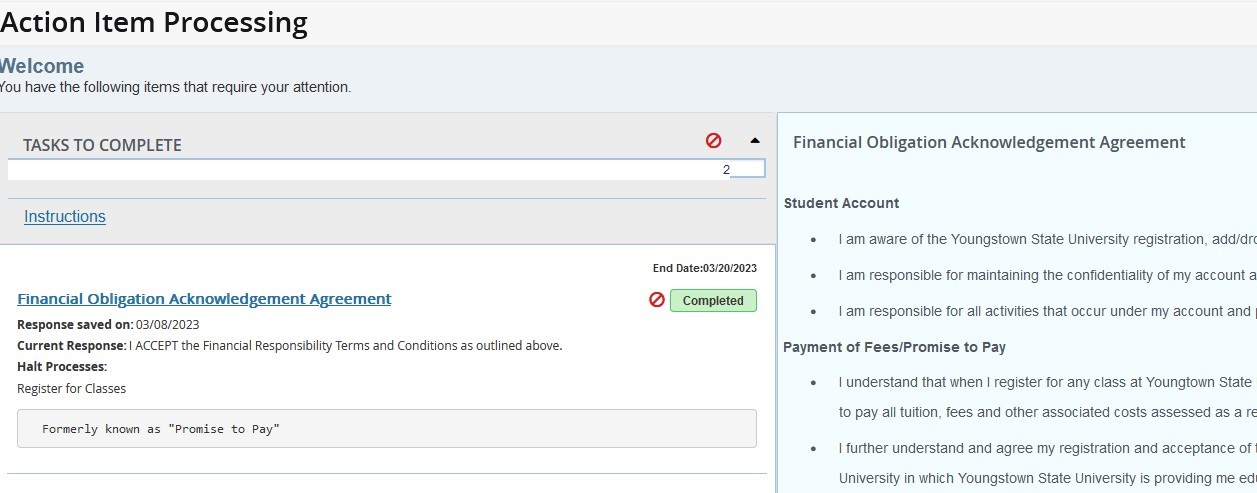
Caution: If you do not want to accept the responsibilities, you will not be able to register for the semester
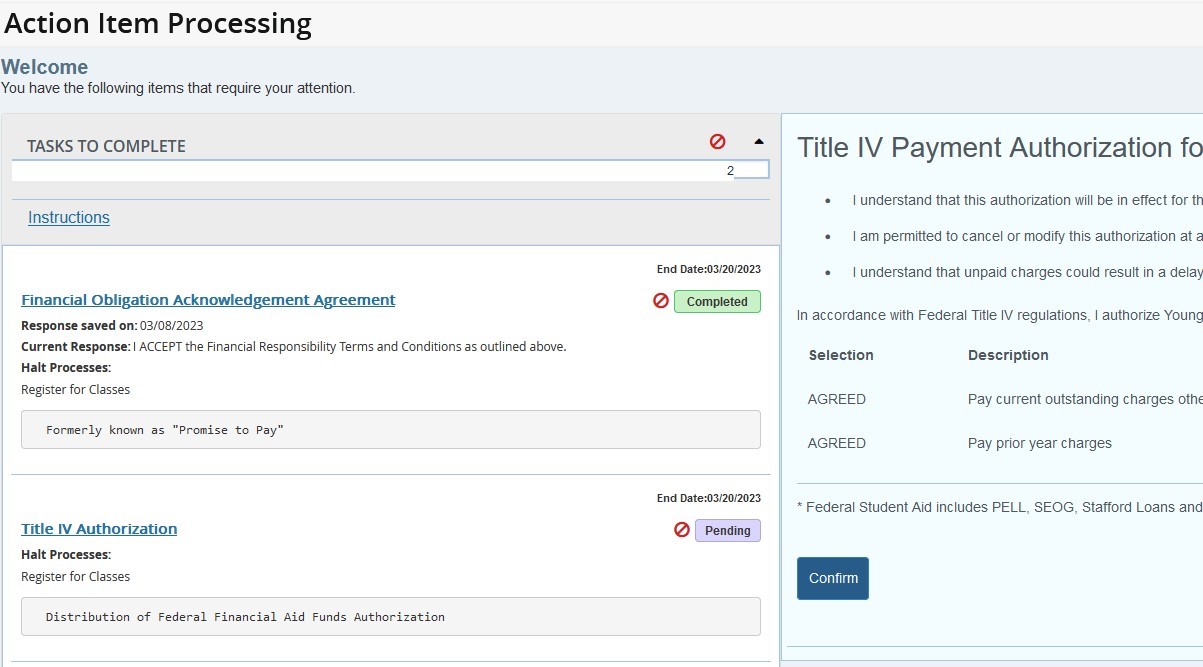
6. Title IV Authorization: Cick on the "Title IV Authorization" box. Read the information, click the "Confirm" button.
Note: Your action will be marked "Completed."
7. Click the blue "Continue" at the top, right corner to enter the registration system.

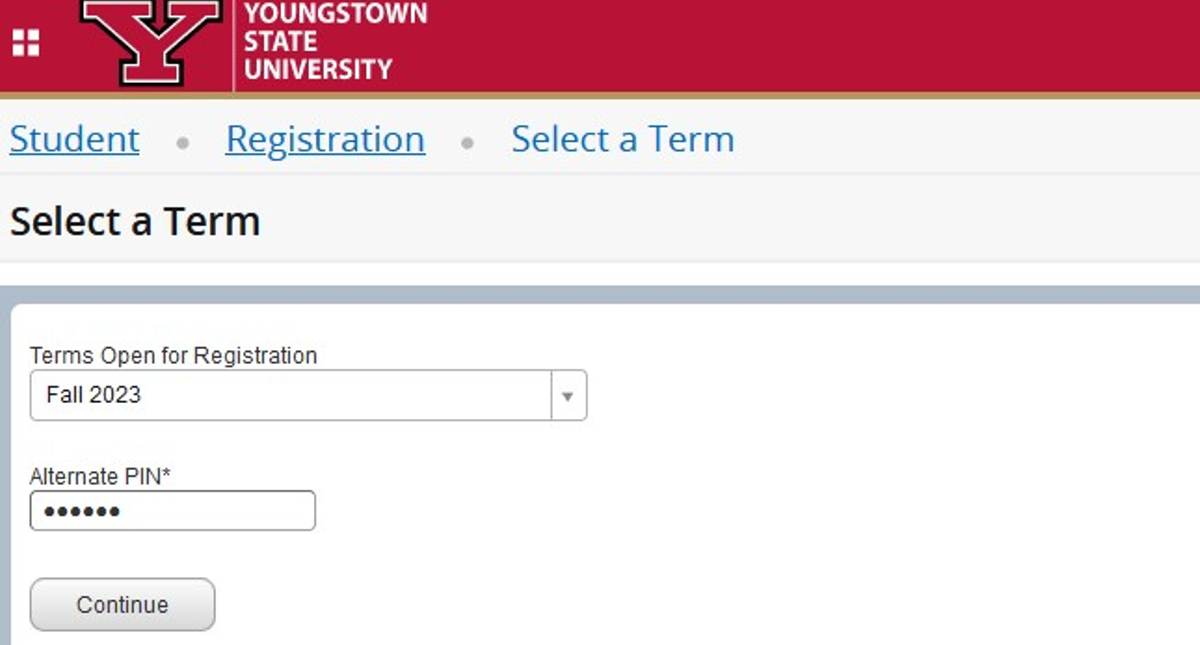
8. Select the appropriate term from the drop-down menu; continue by clicking the "Continue" button. During priority registration, you may be prompted for an alternate pin code below term selection.
9. If you do not know the CRNs for each course you wish to take, use the basic or advance search on the "Find Classes" tab. Click in the subject box for the drop-down menu of subjects to appear. Choose the subject of the class you are looking up. You may also add the course number if you know it. Then, click the "Search" button.
If you do know the CRNs for each course you wish to take, enter each one on the "Enter CRNs" tab. Then, click the "Add to Summary" button.
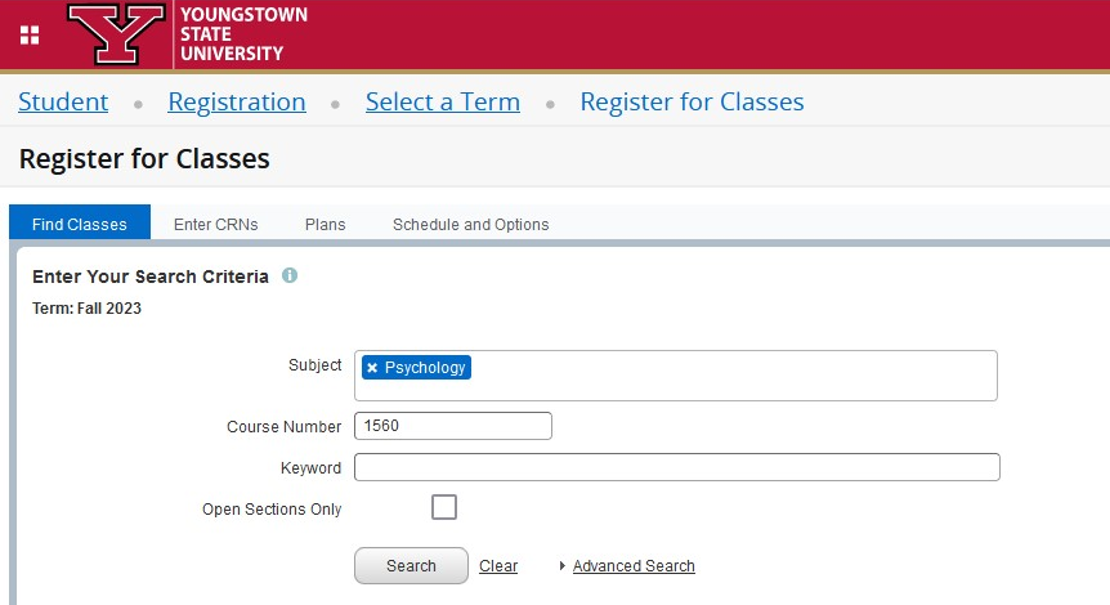
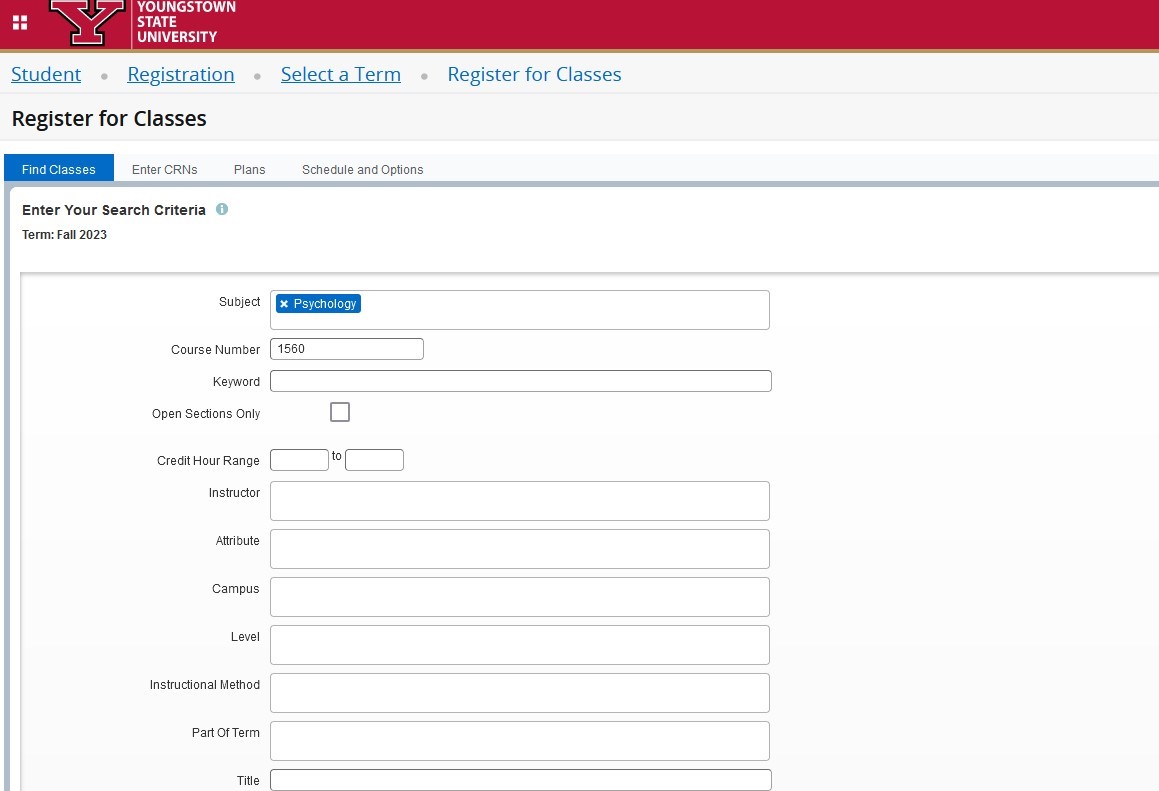
NOTE: The "Advanced Search" option should be used if you would like to search with additional parameters including, but not limited to instructional method, campus, part of term, instructor or evenings/weekends.
10. A list of all classes offered under that subject will appear. Review from left to right to find the course you need. You will see the title, subject, course number, hours, CRN, the open or closed status, instructor (if listed) and the meeting times for the course. You can hover over the "Meeting Times" section to easily view the start and end date of the course, building and room number. Click on the title of a course to view more details including class fees, bookstore link, waitlist information, and possible restrictions.
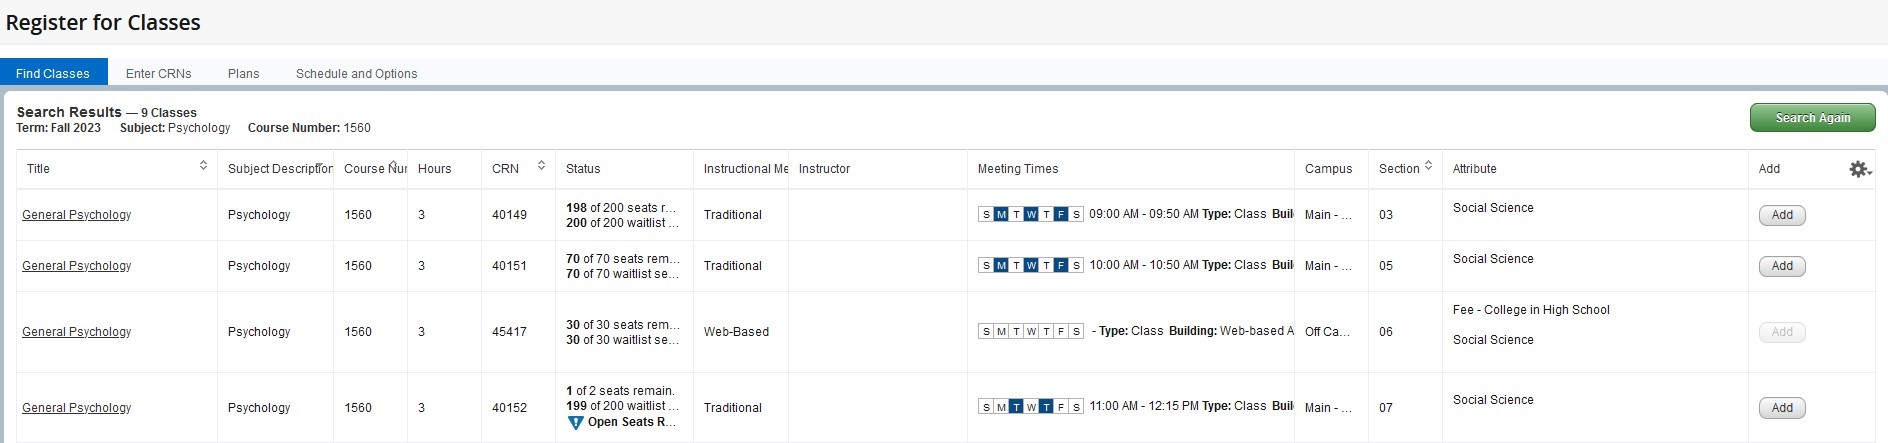
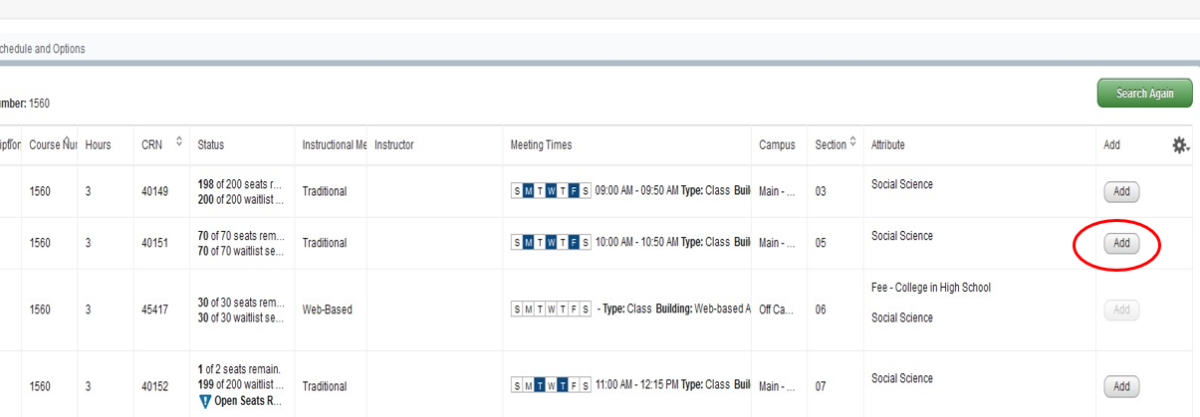
Once you find a course for which you would like to register, click the "Add" button.
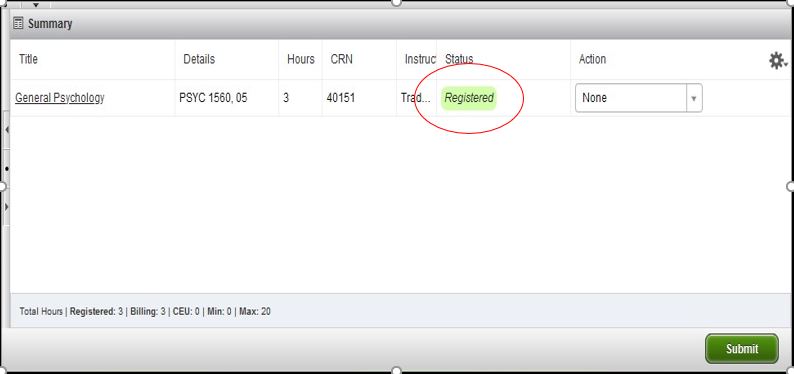
11. A schedule calendar/details and a summary action box will appear at the bottom left of the screen. The course you selected will be listed in the summary box at the bottom, right of the screen with a pending status; it will show as tentative on the schedule calendar. To finalize your registration, select the "Add Course" option in the "Action" drop-down box and click the green "Submit" button. Completed course adds will have a status of "Registered". If your action was not completed, you will see an error message indicating what issue needs resolved before registration can be completed.
NOTE: Click "Schedule Details" and then the drop-down arrow on the left to view the course details for registered or wait listed classes including, but not limited to, your registration or wait list status.
Click "Search Again" to continue to repeat steps 9 and 10 until you have registered for all of the classes you wish to take.
DO NOT USE THE BACK BUTTON ON YOUR BROWSER.

12. Once you are finished, review the courses listed in your summary box. All courses with a status of registered have successfully saved. Verify the total credit hours for which you are registered at the bottom of the summary box. Log out at the top, right corner of the screen.
NOTE: Full-time undergraduate student status is 12 or more total credit hours per semester.

Frequent additional tasks:
Do you need to change a course's grading option?
- If yes, go to the "Schedule and Options" tab. Find the course you wish to change the grading option under "Grade Mode" and select the hyperlink. A drop-down arrow will appear. Select the grade more you wan; click the green "Submit" button on the bottom right of the page to save your selection.
- WARNING: Consult with your academic advisor before making a grade mode change. This change may negatively impact your degree completion.

Do you need to adjust a variable credit hour course?
- If yes, go to the "Schedule and Options" tab. Find the course you wish to change the grading option under "Hours" and select the hyperlink. A drop-down arrow will appear. Type the number of credits within the range listed that you need; click the green "Submit" button on the bottom right of the page to save your selection.
- WARNING: Consult with your academic advisor before changing a variable credit hour course. This change may negatively impact your degree completion.
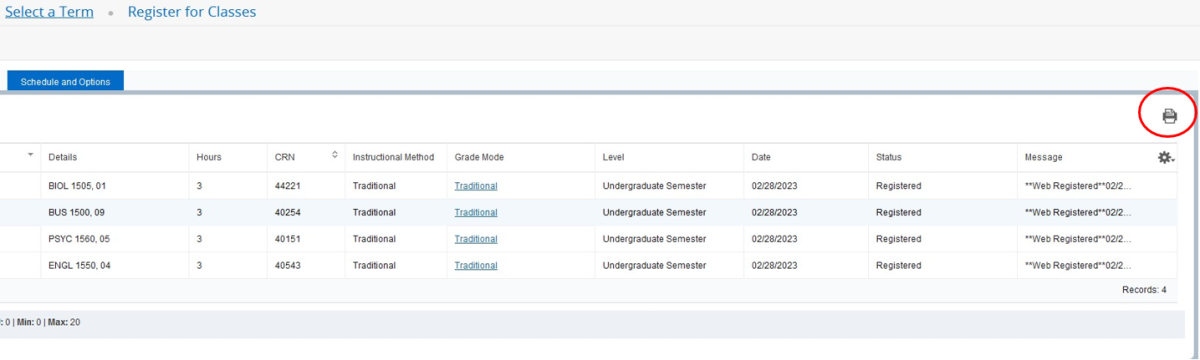
Do you need to print or take a screen shot of your class schedule?
- If yes, go to the "Schedule and Options" tab. Click the printer icon in the top right section. If you wish to print, follow the prompts. If you wish to screen shot it, click cancel for print and take a screen shot of the schedule that populates.
- NOTE: You will need to allow pop-up screens on your browser for printing to work properly.
Instructions without screenshots
1. Log into the Penguin Portal. Click the "Student Dashboard" card.
2. Under the Registration heading, click "Register for Classes."
3. Select the "Register for Classes" tile.
4. If this is your first time trying to register for the semester, you will receive an "Action Item Processing" pop up box. Select "Continue" to complete your required actions. You may also see an "Enhance your Experience" pop up box; select "Accept."
5. Financial Obligation Acknowledgement Agreement: Click on the "Financial Obligation Acknowledgement Agreement" box. Read the information that populates and select the "I ACCEPT" checkbox and "Save" button.
Note: Your action will be marked "Completed".
6. Title IV Authorization: Select the "Title IV Authorization" box. Read the information and select the "Confirm" button.
Note: Your action will be marked "Completed".
7. Click the blue "Continue" at the top, right corner to enter the registration system.
8. Select the appropriate term from the drop-down menu; continue by clicking the "Continue" button. During priority registration, you may be prompted for a pin code below term selection.
9. If you do not know the CRNs for each course you wish to take, use the basic or advance search on the "Find Classes" tab. Click in the subject box for the drop-down menu of subjects to appear. Choose the subject of the class you are looking up. You may also add the course number if you know it. Then, click the "Search" button.
If you do know the CRNs for each course you wish to take, enter each one on the "Enter CRNs" tab. Then, click the "Add to Summary" button.
NOTE: The "Advanced Search" option should be used if you would like to search with additional parameters including, but not limited to instructional method, campus, part of term, instructor or evenings/weekends.
10. A list of all classes offered under that subject will appear. Review from left to right to find the course you need. You will see the title, subject, course number, hours, CRN, the open or closed status, instructor (if listed) and the meeting times for the course. You can hover over the "Meeting Times" section to easily view the start and end date of the course, building and room number. Select the title of a course to view more details including class fees, bookstore link, waitlist information, and possible restrictions. Once you find a course for which you would like to register, click the "Add" button.
11. A schedule calendar/details and a summary action box will appear at the bottom left of the screen. The course you selected will be listed in the summary box at the bottom right of the screen with a pending status; it will show as tentative on the schedule calendar. To finalize your registration, select the "Add Course" option in the "Action" drop-down box and click the green "Submit" button. Completed course adds will have a status of "Registered". If your action was not completed, you will see an error message indicating what issue needs resolved before registration can be completed.
NOTE: Click "Schedule Details" and then the drop-down arrow on the left to view the course details for registered or wait listed classes including, but not limited to, your registration or wait list status.
Click "Search Again" to continue to repeat steps 9 and 10 until you have registered for all of the classes you wish to take.
DO NOT USE THE BACK BUTTON ON YOUR BROWSER.
12. Once you are finished, review the courses listed in your summary box. All courses with a status of registered have successfully saves. Verify the total credit hours for which you are registered at the bottom of the summary box. Log out at the top, right corner of the screen.
NOTE: Full-time undergraduate student status is 12 or more total credit hours per semester.
Frequent additional tasks:
Do you need to change a course's grading option?
- If yes, go to the "Schedule and Options" tab. Find the course you wish to change the grading option under "Grade Mode" and select the hyperlink. A drop-down arrow will appear. Select the grade more you wan; click the green "Submit" button on the bottom right of the page to save your selection.
- WARNING: Consult with your academic advisor before making a grade mode change. This change may negatively impact your degree completion.
Do you need to adjust a variable credit hour course?
- If yes, go to the "Schedule and Options" tab. Find the course you wish to change the grading option under "Hours" and select the hyperlink. A drop-down arrow will appear. Type the number of credits within the range listed that you need; click the green "Submit" button on the bottom right of the page to save your selection.
- WARNING: Consult with your academic advisor before changing a variable credit hour course. This change may negatively impact your degree completion.
Do you need to print or take a screen shot of your class schedule?
- If yes, go to the "Schedule and Options" tab. Click the printer icon in the top right section. If you wish to print, follow the prompts. If you wish to screen shot it, click cancel for print and take a screen shot of the schedule that populates.
- NOTE: You will need to allow pop-up screens on your browser for printing to work properly.
Online video instructions