
Alert Box
Notification Box
Emailing and Printing Student Schedule
1. Log into the Penguin Portal. Click on "Student Dashboard."

2. Under the "Registration" heading, select "Register for Classes."

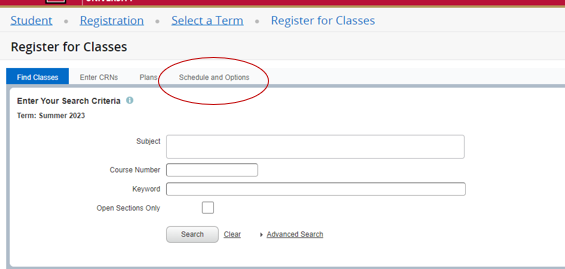
3. Click on the “Register for Classes” tile and select the requested term.


4. If you are not registered for classes already, register for all the classes you need.

5. Once you have registered for all of your classes, click on “Schedule and Options” near the top of the page.
6. You will see your summary schedule. In the top right corner, you will see an email icon and a printer icon

7. To email yourself or another person your schedule, click the email icon

8. A small window will appear. Enter the email address(es) you wish to send your schedule to. “Myself” with your student email address will always be check marked.
Once you have entered appropriate email addresses, click “Send.” An email will arrive from onestop@ysu.edu and will include your requested schedule. You can also click on the file in your email to add your schedule to your calendar.
Note: If you are using AdBlock you only need to click “Send” once. Allow for several minutes to pass for the email to arrive.
Please send again if you make changes to your schedule

9. To print your schedule, click on the printer icon. If you wish to print, follow the prompts. If you wish to take a screenshot of your schedule, click cancel for print and take a screenshot of the screen that populates.
Note: You will need to allow pop-up screens on your browser for the printing feature to properly work
