
Alert Box
Notification Box
From Video to DVD Tutorial
From Video to DVD Tutorial
The iMovie Workspace
Image
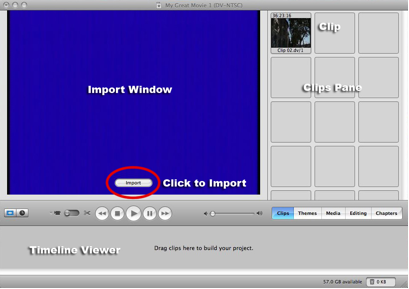
- This is the iMovie HD Workspace.
- The Import Window displays video to be imported from an external source, or already captured clips.
- The Clips Pane stores all captured video clips.
- Clips dragged to the Timeline Viewer can be edited.
- The Import Button (circled) is used to import video.
Capturing Video from a VHS Tape
- To capture video from a VHS tape, you will need to use the “breakout box”
Image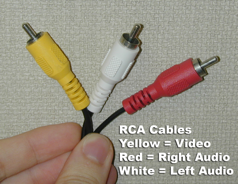
Image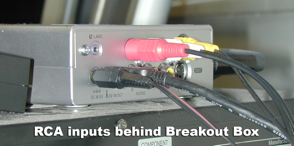
Image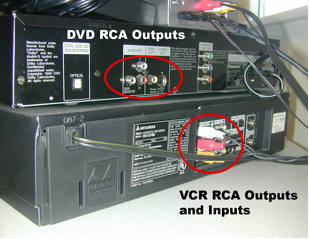
- Begin by connecting the RCA cables (the cable with the yellow, red, and white plugs) from the outputs on the back of the VCR to the inputs on the back of the breakout box
- If the breakout box is not already connected to one of the computer’s FireWire ports, do so now.
Image
- Next, make sure that the breakout box is powered ON and is set to Analog In
- Open iMovie HD and create a new project
- In iMovie HD, click the mode switch to set iMovie HD to camera mode
Image
- Press the Import button to begin capturing video.
- Now press play on the VCR to begin playing the tape.
- You should see the video being captured in the iMovie HD workspace.
- When you are finished capturing video, press Import again to stop importing.
- The captured video is now in the Clips plane in upper right portion of the workspace.
Capturing Video from a DVD
- To capture video from a DVD, follow the same procedure as capturing from a VHS tape, only connect the breakout box to the DVD player’s RCA outputs instead of the VCR (Note: DVDs cannot be captured from the computer’s DVD drive).
To Import Video from your Camcorder
- Turn on your camcorder, and set the camcorder to VTR mode (some camcorders call this Play or VCR).
- Connect your camcorder to your computer using a FireWire cable.
Image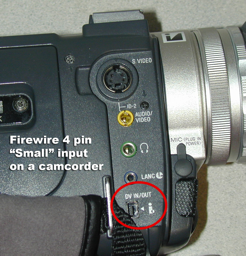
Image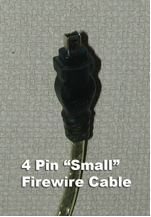 Image
Image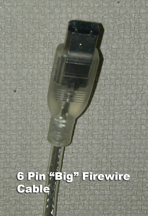
- The 4 pin “small” end plugs into the camcorder, while the 6 pin “big” end plugs into the computer.
- In iMovie HD, click the mode switch to set iMovie HD to camera mode
Image
- Use the capture controls to review your tape in the iMovie monitor.
Image
- Rewind the tape to a few seconds before the point where you want to start importing.
- Click Play.
- Click the Import button in the iMovie monitor or press the Space bar to begin capturing. This works best if done slightly before the desired portion or video.
- Your imported video appears in the Clips pane.
- Click Import again or press the space bar when you want to stop importing.
Editing Video
- After the video has been captured, drag the clip(s) from the Clips pane to the Timeline. Only clips on the Timeline can be edited, exported, and burned to DVD.
Image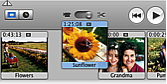
- You can switch to a more detailed Timeline view by pressing the clock button just above the Timeline Viewer.
Image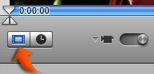
- A basic editing technique is to split the clip. This is useful for cutting unneeded footage out of a longer clip.
- To split video, select the clip from the Timeline, and position the playhead (the downward-facing triangle located just below the Import window) where you intend to split the clip.
- Choose Edit > Split Video Clip at Playhead
iDVD Interface
Image
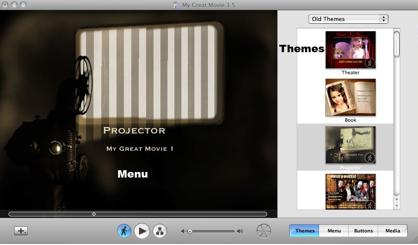
- This is the iDVD interface
- The main area to the left is the Menu display
- The area on the right shows Themes that can be selected to enhance the look of your DVD
Burning a DVD
- Once the video is captured, if you want to add chapters, select the Chapters button in the lower right of the iMovie HD workspace.
- To insert a chapter, move the play head to the desired time and select the Add Chapter button.
- Once the video is captured, in iMovie HD go to Share > iDVD and you will be prompted to click another Share button for confirmation.
- iDVD will open automatically.
- Choose a theme from the list of themes in the upper right of the iDVD workspace.
- Insert a blank DVD-R into the DVD drive if you have not already.
- When you are finished click the burn icon on the bottom of the workspace.
Image
- Click OK or Yes to all dialog boxes that appear to proceed.
- After the DVD is finished (this may take several hours, depending on the video’s duration), it will automatically be ejected. Insert another DVD to make another copy, or click Done to complete the process.
- You can now choose to save the project if you wish to burn more copies in the future. Since the video is already encoded, the burning process will only take 10-20 minutes for additional copies.
Sharing Video
- If you want to export your video as a file for you to view and share at your convenience, select “Share” from the Share menu (Note: Only clips on the Timeline of iMovie will be shared).
Image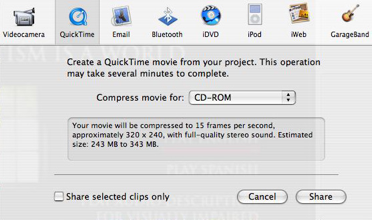
- Choose the “QuickTime” option from the selection of buttons at the top of the screen
- You can choose if you would like to export the clip for CD, e-mail, streaming video for the web, etc…
- The option you choose determines the file size of the video as well as the quality. The greater the file size, the better the video quality.
- Choose the “Web” option and click Share.
- Name the file and click Save.